
How to remove tarnish from silver: Quick Fixes
Ever pull out your favorite silver necklace, only to find it's lost its brilliant shine to a dull, dark coating? It's a frustrating moment, but don't worry—that tarnish isn't permanent. With a few simple tricks, you can bring back that sparkle and make your jewelry look brand new again.
Why Your Silver Tarnishes and How to Fix It
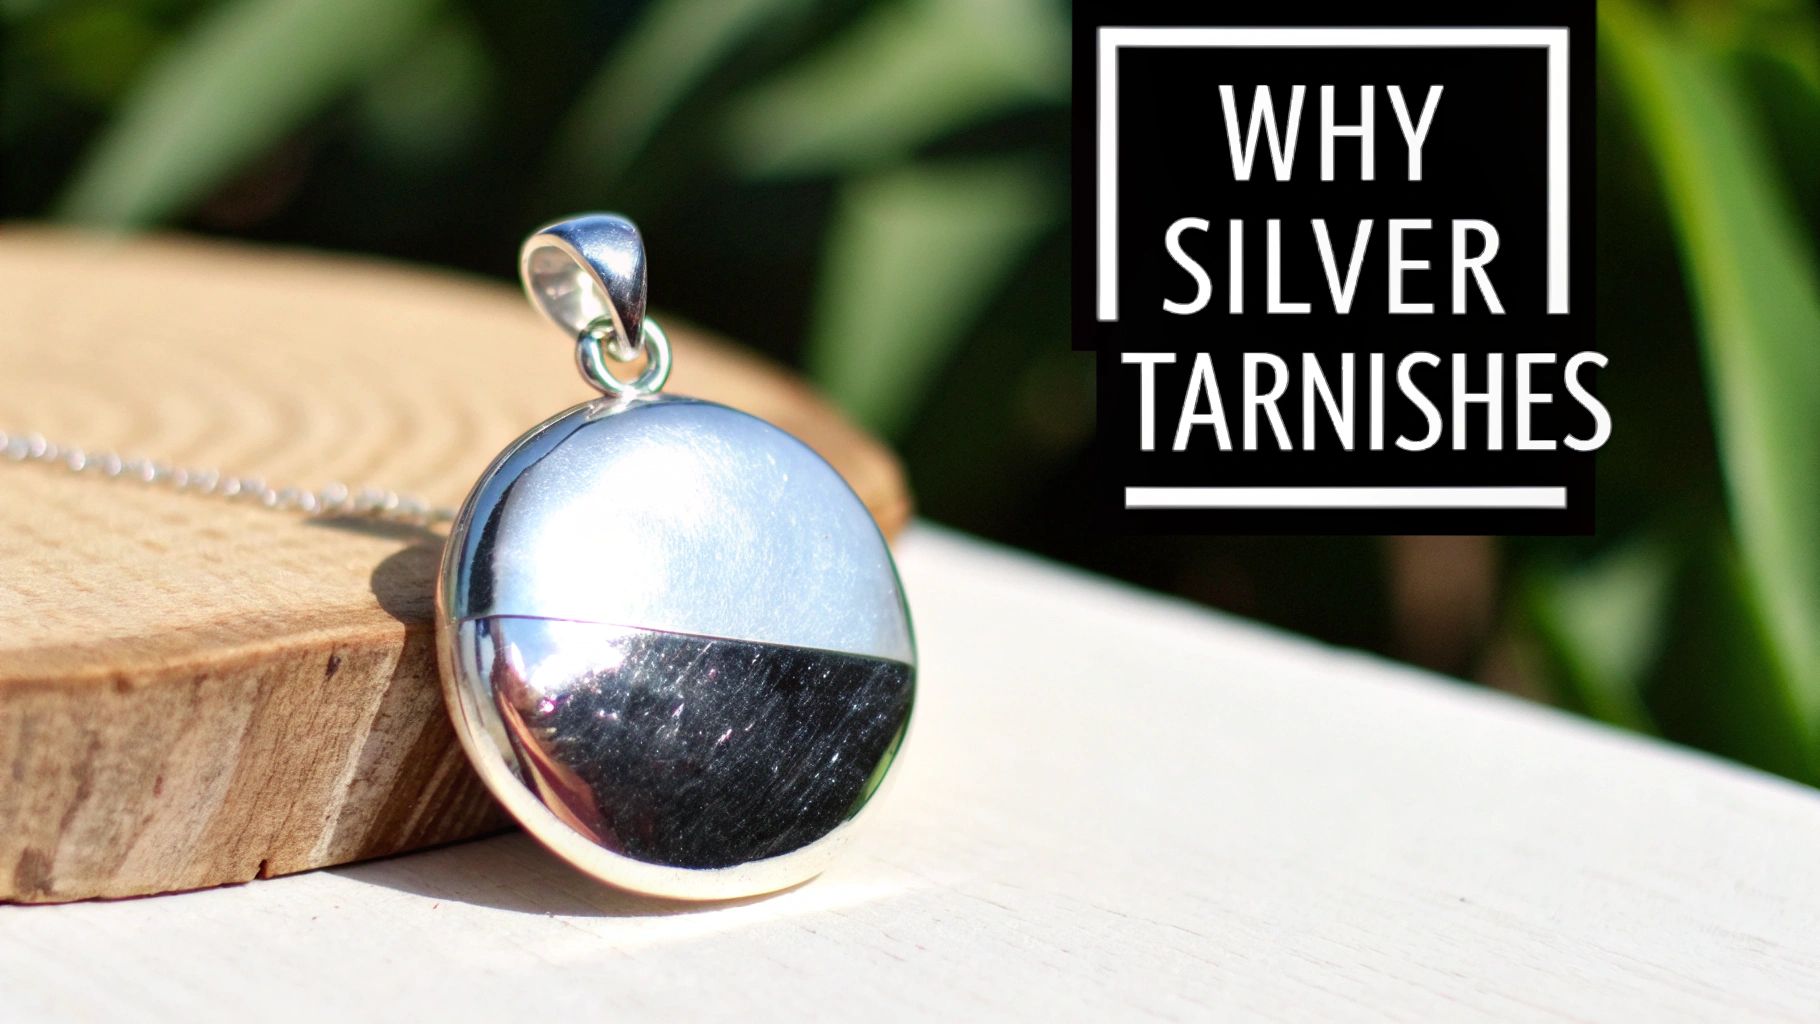
First things first: that cloudy film on your silver isn't a sign of poor quality or damage. Tarnish is just a natural chemical reaction. When silver is exposed to sulfur compounds floating around in the air, a thin layer of silver sulfide forms on the surface. That's the dark stuff you see.
Things like humidity, air pollution, and even contact with everyday materials like wool, rubber, or certain foods can speed up the process. The great news is that it’s purely superficial. It hasn't damaged the metal, and with a little TLC, your cherished Molenia pieces can be restored to their original glory.
Understanding Your Cleaning Options
When it's time to tackle that tarnish, you've got a few great options. The right method really depends on how much tarnish has built up and the specific piece you're cleaning. The goal is always the same: remove the tarnish gently without scratching the beautiful silver underneath.
For an even deeper dive into the science and solutions, this comprehensive guide on removing tarnish from silver is a fantastic resource.
Here’s a quick rundown of the main approaches people take:
- Gentle Home Remedies: You’d be surprised what you can do with common household items. These are often the safest and easiest first step for light to moderate tarnish.
- Commercial Cleaners: For more stubborn jobs, specially formulated polishes, cloths, and dips can deliver powerful results quickly.
- Electrochemical Methods: This sounds complicated, but it's a simple and fascinating science experiment you can do at home! It uses a chemical reaction to convert the tarnish back into silver, no scrubbing required.
To help you choose the right path for your jewelry, here’s a quick comparison of the most common cleaning methods.
Quick Guide to Silver Cleaning Methods
| Method | Best For | Effort Level | Risk to Silver |
|---|---|---|---|
| Polishing Cloth | Light tarnish, routine maintenance | Low | Very Low |
| Soap & Water | Removing dirt, very light tarnish | Low | Very Low |
| Baking Soda Paste | Moderate tarnish, intricate designs | Medium | Low (can be abrasive if not gentle) |
| Baking Soda & Foil Bath | Heavy tarnish, multiple pieces | Medium | Very Low (non-abrasive) |
| Commercial Dip | Heavy, widespread tarnish | Low | Medium (can be harsh on some finishes) |
| Commercial Polish | Moderate to heavy tarnish | Medium | Low to Medium (follow instructions) |
As you can see, there’s a solution for every situation. The key is to start with the gentlest method first and only move to stronger options if needed.
One of my favorite techniques, especially for delicate pieces, is the electrochemical one (the baking soda and foil bath). It's incredibly gentle because it reverses the chemical reaction instead of physically scrubbing the tarnish away. This means the surface of your treasured items is perfectly preserved.
Ultimately, knowing how to clean your silver is just one part of the puzzle. Preventing tarnish in the first place is just as important!
Gentle DIY Methods for a Brilliant Shine
You don’t need to buy a bunch of harsh chemicals to bring your silver back to life. Believe it or not, some of the best and safest cleaners are probably sitting in your kitchen right now. These simple home remedies are perfect for restoring the brilliance of your recycled sterling silver and silver-plated Molenia pieces without causing any harm.
Knowing how to handle tarnish yourself is a game-changer. It not only saves you a trip to the jeweler but also gives you total control over how your treasured accessories are cared for. Let's walk through three of our go-to, time-tested techniques.
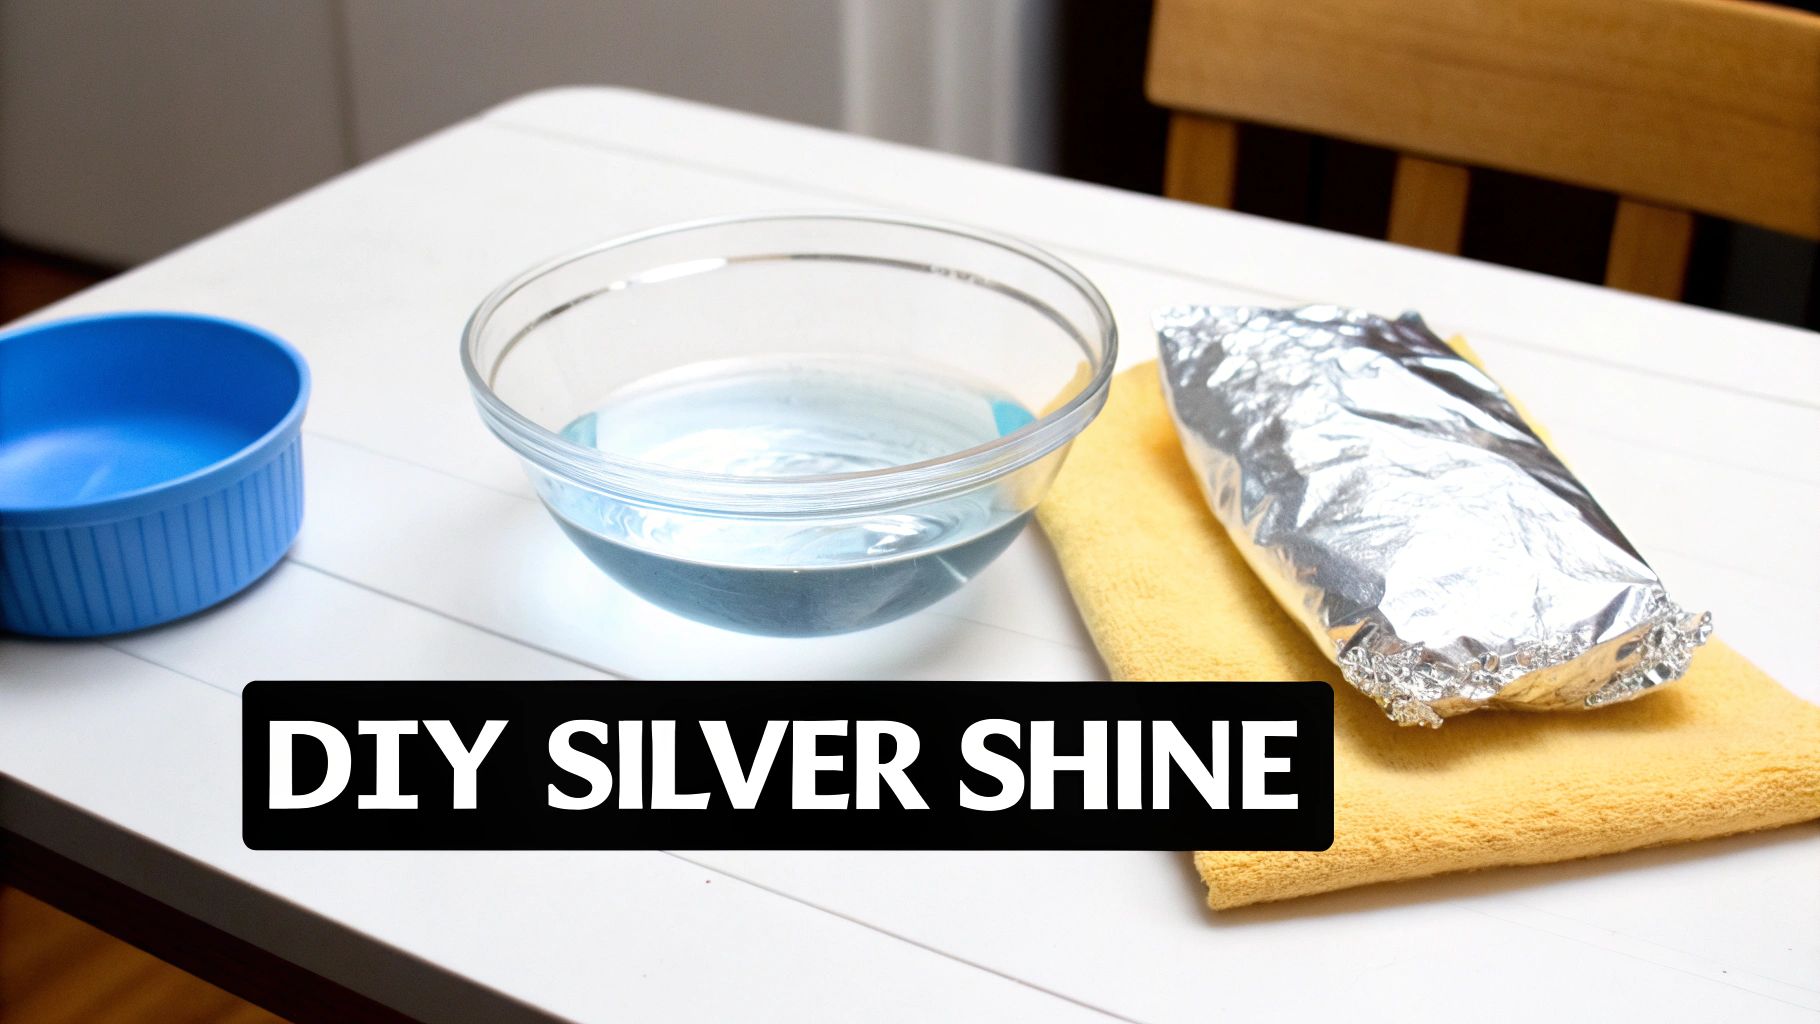
The Aluminum Foil and Baking Soda Bath
This one feels a bit like a high school science experiment, and that's because it is! The magic here is a gentle electrochemical reaction that actually converts the silver sulfide (the tarnish) back into silver. It literally lifts the discoloration away without any rubbing. I absolutely love this method for pieces with intricate details or when I need to clean a whole batch of jewelry at once.
Here’s what you’ll need:
- A bowl or dish lined with aluminum foil, making sure the shiny side is facing up.
- One tablespoon of baking soda for every cup of hot water you use.
- Your tarnished silver jewelry.
Just lay your jewelry inside the foil-lined bowl, ensuring it’s actually touching the aluminum. Pour in the hot water and baking soda mixture until everything is completely submerged. You might catch a faint, sulfur-like smell—that’s just proof the reaction is working! Let it sit for a few minutes, and you'll see the tarnish just disappear. Carefully pull the jewelry out with tongs, give it a quick rinse under cool water, and pat it dry with a soft, lint-free cloth.
This non-abrasive technique is my top recommendation for heavily tarnished items. It’s fantastic because it preserves the delicate surface of the silver, meaning you don't lose any of the precious metal in the cleaning process.
A Simple Dish Soap Soak for Light Touch-Ups
Sometimes, your silver isn't truly tarnished—it's just a bit dull from the daily buildup of lotions, oils, and general grime. For those moments, a quick, gentle bath is all it needs. This is the mildest approach you can take, and it should always be your first move.
Just add a few drops of a mild, phosphate-free dish soap to a bowl of warm water. Let your jewelry soak for about five to ten minutes. If you need to get into tiny crevices around a clasp or setting, an extra-soft toothbrush (like one for a baby) works wonders. Rinse everything thoroughly under cool running water, and be sure to dry it completely with a soft cloth. This simple routine is a key part of good jewelry care. For a deeper dive on daily upkeep, check out our guide on how to clean sterling silver jewelry.
Creating a Gentle Paste for Stubborn Spots
When you’re dealing with a few stubborn spots but the rest of the piece looks fine, a simple paste of baking soda and water is your best friend. This gives you way more control than a full soak and is perfect for pieces that can't be submerged, especially those with certain gemstones.
Here’s the process:
- Mix two parts baking soda with one part water. You’re looking for a thick, paste-like consistency.
- Dab a small amount of the paste onto the tarnished areas using a soft cloth or even just your fingertip.
- Gently rub in a circular motion. The key here is to be gentle—let the paste do the work, not pressure.
- Rinse all the paste off with lukewarm water and buff the piece dry until it shines.
Just remember, baking soda can be a little abrasive, so gentleness is key to avoid creating tiny scratches. It's a fantastic trick for targeted cleaning right where you need it. For more general advice on cleaning tarnished jewelry effectively, there are some great resources that cover a wide range of pieces.
Choosing the Right Commercial Silver Cleaner
Sometimes, the trusty home remedies just don't have enough oomph to tackle stubborn tarnish. That's when it's time to bring in the pros—the commercial silver cleaners. These products are specifically designed to dissolve tarnish and can work wonders, often much faster than what you can whip up in your kitchen.
But walking down that cleaning aisle can be a bit overwhelming. You'll see polishing cloths, liquid dips, foams, and creams, and it’s not always obvious which one is right for your precious pieces. Let's break down the options so you can choose wisely for your Molenia treasures.
Polishing Cloths vs. Liquid Dips
My first recommendation for almost everyone is to start with a good polishing cloth. Think of it as the safest, most controlled way to bring back the shine. These aren't just any old rags; they're usually a two-part system. One side is treated with a very fine cleaning agent to lift the tarnish, and the other is a soft, non-treated cloth for buffing to a brilliant shine.
Polishing cloths are fantastic for routine touch-ups and light discoloration. They’re also your best bet for silver-plated jewelry because you can use a very gentle touch and avoid wearing down that delicate outer layer.
Liquid dips are a whole different ballgame. They're the heavy-hitters for when your silver is deeply tarnished. You just dunk your jewelry for a few seconds, and a chemical reaction melts the tarnish away. It sounds easy—and it is—but this power comes with a warning. Dips are aggressive. They can easily remove the beautiful, intentional darkening (called a patina) that gives detailed pieces their depth. They can also be a real hazard for porous gemstones.
For a closer look at getting that perfect shine without overdoing it, check out our guide on how to polish silver jewelry.
A Pro's Tip: Always start with the gentlest method first. A polishing cloth should be your go-to tool. Only reach for a chemical dip when you're dealing with serious, all-over tarnish on a sturdy, solid silver piece that doesn't have any delicate stones.
Reading Labels and Dodging Abrasives
Here's the most critical piece of advice I can give you: pay attention to how abrasive a cleaner is. Overly aggressive formulas will literally scratch the surface of your silver. They might be tiny, microscopic scratches, but over time, they’ll build up and permanently dull your jewelry's beautiful luster. Always, always look for products that are explicitly labeled "non-abrasive."
For ages, the biggest challenge in silver care has been finding a balance between cleaning power and gentleness. Older cleaners often relied on harsh grit to get the job done. In fact, some studies on historical cleaning methods found that while abrasive ingredients did remove tarnish, they often caused significant surface damage. This is exactly why it's so important to stick with modern formulas designed for fine jewelry.
When you're scanning the ingredients list, keep an eye out for these:
- Avoid: High concentrations of ammonia and phosphates. These can be too harsh, especially for silver-plated pieces or jewelry set with gemstones.
- Look For: Gentle ingredients that lift tarnish chemically instead of scraping it off. A huge plus is finding a product that includes a tarnish inhibitor. This leaves behind an invisible shield that helps slow down future tarnishing—a real time-saver
Safely Cleaning Silver Jewelry with Gemstones
When a sparkling gemstone is part of your favorite silver piece, cleaning calls for a little extra care. It's a delicate dance. You want to bring back the silver's brilliant shine without accidentally harming the beautiful stone it holds.
Some of the most effective tarnish removers can be a gemstone's worst enemy. Strong chemical dips, for instance, are great for plain silver but can wreak havoc on porous stones like turquoise or pearls, leading to discoloration or surface damage. The same goes for ultrasonic cleaners; their powerful vibrations can loosen settings or even cause tiny fractures in softer gems like emeralds. And abrasive pastes? Definitely steer clear—they can easily scratch a moissanite or ruby's facets.
A Stone-Safe Cleaning Protocol
The trick is to be gentle and targeted. You're aiming to clean the metal around the stone, not the stone itself.
Your new best friend for this task is a simple mix of warm water and a few drops of mild dish soap. Grab an extra-soft toothbrush (a baby toothbrush works wonders here!) and dip it into the sudsy water. From there, gently scrub only the silver parts of your jewelry. Be extra careful around the setting, working your way around the gemstone without making too much contact.
Expert Tip: For super delicate or porous stones like opals and amber, I recommend skipping submersion entirely. Just dampen a soft cloth with the soapy water and carefully wipe down the silver, doing your best to keep the stone dry.
After you've gently scrubbed away the tarnish, give the piece a good rinse under cool running water. The next step is critical: dry it immediately and completely with a soft, lint-free cloth. Any moisture left hiding in the nooks and crannies of a setting can invite new tarnish or even damage the gemstone over time.
For more detailed tips on caring for your moissanite pieces specifically, check out our guide on how to clean moissanite jewelry at home.
This visual guide can also help you figure out the best cleaning method based on how much tarnish has built up.
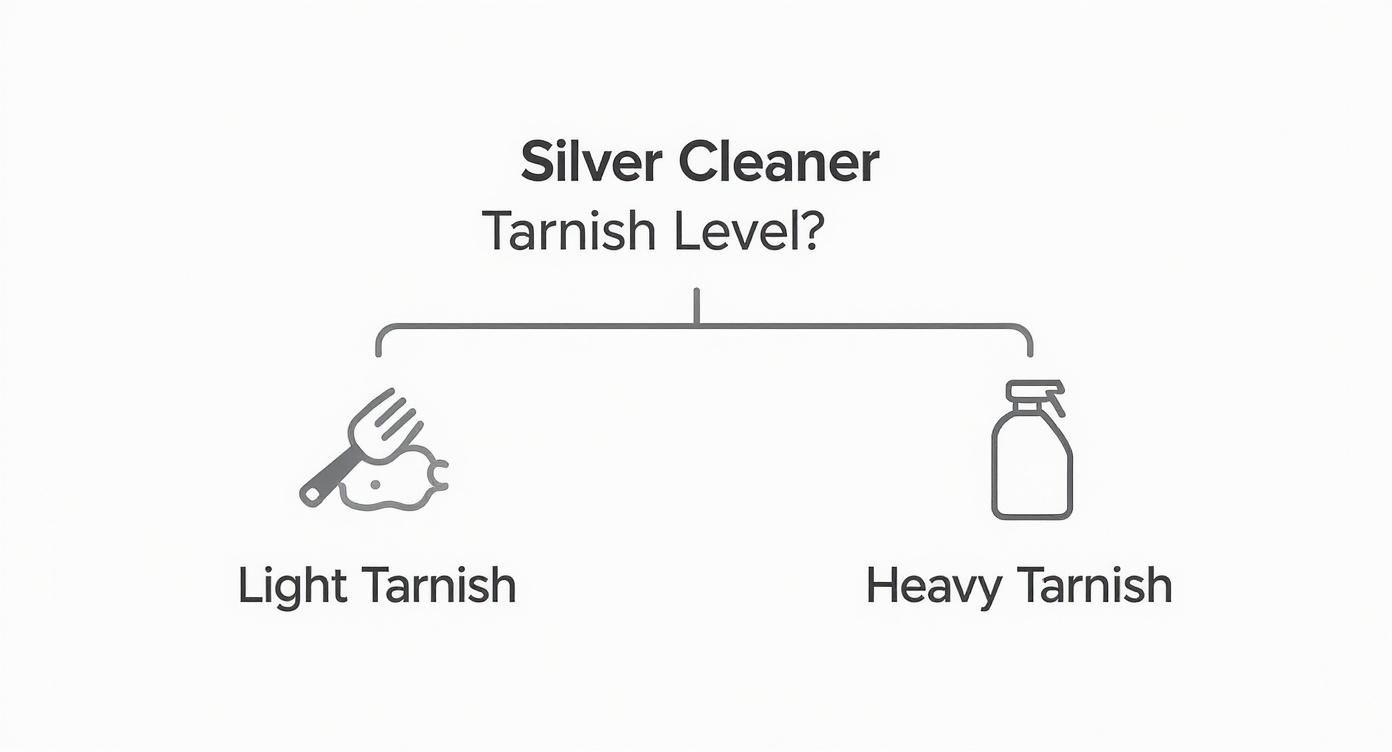
Think of it as a quick decision tree. For light touch-ups, a polishing cloth is perfect. For more serious tarnish, a liquid cleaner (used carefully!) might be the better option.
Gemstone Cleaning Safety Guide
To make things even easier, I've put together a quick reference guide. It's a cheat sheet for keeping your favorite Molenia pieces looking their best, outlining what's safe and what to avoid for common gemstones.
Gemstone Cleaning Safety Guide
| Gemstone Type | Safe Cleaning Methods | Methods to Avoid |
|---|---|---|
| Diamond & Moissanite | Mild soap & water, soft brush, polishing cloths | Harsh chemical dips, abrasive pastes |
| Emerald & Ruby | Mild soap & water, soft cloth wipe-down | Ultrasonic cleaners, steam cleaners, dips |
| Pearl, Opal & Turquoise | Damp soft cloth only, no submersion | ALL chemical cleaners, ultrasonic, soap |
| Amethyst & Citrine | Mild soap & water, soft brush | Prolonged heat/sunlight, harsh chemicals |
Always remember, when in doubt, the gentlest method is the best one. Taking that extra minute to clean your jewelry thoughtfully will ensure it stays beautiful for years to come.
How to Prevent Tarnish and Keep Silver Gleaming
While it’s great to know how to banish tarnish, an ounce of prevention is truly worth a pound of cure. If you can stop tarnish before it even starts, you’ll spend a lot less time cleaning and a lot more time enjoying your jewelry. A few simple habits are all it takes to keep your pieces looking brilliant and ready to wear.
The whole game is about minimizing your silver's exposure to the two things it hates most: sulfur and moisture. Just a few small tweaks to your daily routine can make a huge difference in the long-term health and sparkle of your Molenia collection.
Build Simple, Effective Habits
Here's one of the easiest but most effective habits you can adopt: make your jewelry the last thing you put on and the first thing you take off. Think about it—hairspray, perfume, lotions, and makeup are loaded with chemicals that can speed up tarnishing. By putting your silver on after you’re all ready, you're protecting it from that direct hit.
It’s just as important to take off your jewelry before any activity that involves moisture or harsh chemicals.
- Before showering or bathing: Soap and shampoo residue can leave a dull film on your silver that attracts tarnish.
- Before swimming: Chlorine is silver’s arch-nemesis, and saltwater isn't much friendlier. Both can cause serious, rapid discoloration.
- Before exercising: Your sweat contains salts and acids, creating the perfect storm for tarnish to form.
Another game-changer? A quick wipe-down with a soft, dry cloth after every single wear. This little two-second ritual removes skin oils and moisture, which goes a long way in slowing down oxidation.
The most overlooked part of silver care is what you do after you take it off. Proper storage is your #1 defense against tarnish. Leaving your jewelry on a dresser is like leaving the front door wide open for humidity and airborne chemicals.
Master the Art of Smart Storage
The goal is simple: store your silver somewhere cool, dry, and away from direct sunlight. An airtight container is the gold standard because it cuts off the chemical reaction that causes tarnish in the first place. This is where a little bit of planning really pays off.
Museums take this seriously to protect priceless silver artifacts. As you can discover in conservation standards, they often wrap cleaned silver in acid-free tissue paper and then seal it in bags with special anti-tarnish strips to absorb airborne sulfur. This shows just how critical a controlled environment is.
Luckily, you can easily bring that level of care home. Storing each piece in its own small, sealed plastic bag or a dedicated anti-tarnish pouch is incredibly effective. For an extra layer of protection, toss in a small anti-tarnish strip or even a piece of chalk—both work wonders to absorb any lingering moisture and sulfur.
For an even deeper dive into this, check out our comprehensive guide on how to prevent silver from tarnishing. A little effort here means your silver will stay sparkling for years to come.
Your Silver Tarnish Questions, Answered
Even after you've got the basics down, a few questions always pop up when it comes to keeping silver looking its best. Don't worry, you're not alone! It's totally normal to have some "what ifs" as you get the hang of silver care.
Let’s tackle some of the most common questions we hear at Molenia, so you can feel like a pro when taking care of your favorite pieces.
How Often Should I Really Be Cleaning My Silver?
Honestly, there’s no strict schedule. It all comes down to how often you wear a piece and the environment it's in. If you wear a necklace every single day, giving it a quick wipe with a soft cloth before you put it away is a fantastic habit. Beyond that, you only need to do a "deep clean" when you actually see tarnish starting to creep in.
In fact, over-cleaning can do more harm than good. Too much scrubbing or dunking in cleaners can gradually wear away the metal's surface. The best rule of thumb? Clean your Molenia jewelry only when it looks like it needs a little help to get its shine back.
Is It Really Okay to Use Toothpaste?
This is a big one, and we have to say: please don't! It’s a popular internet "hack," but it's a myth that can seriously damage your jewelry. Toothpaste is made to be abrasive—that's how it scrubs plaque off your tough tooth enamel. Sterling silver is much softer. Those same gritty bits in toothpaste will leave a network of tiny scratches all over the surface, permanently dulling its gorgeous luster.
Stick with methods designed to be gentle on jewelry. A simple polishing cloth or a paste made from baking soda and water is all you need to lift tarnish without causing any harm.
Can I Use the Foil and Baking Soda Trick on My Silver-Plated Pieces?
You can, but you have to be extra careful. The chemical reaction itself is safe for silver plating, but remember, that shiny layer is incredibly thin.
We suggest keeping the soak time super short. Instead of leaving your jewelry in the bath, check on it every 30 seconds. The second the tarnish disappears, pull it out, give it a good rinse, and dry it completely. If you’re nervous, test the method on a small, hidden spot first to make sure it agrees with the finish.
Why Did My Silver Tarnish So Fast Right After I Cleaned It?
This is a classic—and frustrating—problem. It almost always comes down to one of two things. First, some aggressive chemical dips can strip off everything—not just the tarnish, but also any protective anti-tarnish coating your jewelry might have had. This leaves the silver completely exposed and ready to react with the air again.
The other common culprit is moisture. If your jewelry isn't bone-dry when you put it away, any trapped water will just speed up the tarnishing process. The fix is easy: always rinse every bit of cleaner off your jewelry. Then, dry it thoroughly—more than you think you need to—before tucking it away in an anti-tarnish bag. A freshly cleaned surface needs that extra protection!
At Molenia Jewelry, we believe caring for your jewelry should bring you as much joy as wearing it. We pour that same love into crafting our beautiful recycled sterling silver and moissanite collections, designed to shine for years to come. Find your next forever piece at https://www.moleniajewelry.com.