
How to Layer Necklaces for a Flawless Look
Layering necklaces is all about creating a bit of visual magic with the pieces you already love. From my experience, the secret isn't just throwing on a bunch of chains; it's about intentionality. I always suggest picking a “hero” piece to anchor your look, then building around it with chains of different lengths. A good rule of thumb is to keep at least a one-inch difference between them—this little trick goes a long way in preventing tangles and letting each necklace have its own moment.
Building Your Foundation for Layering Necklaces
Before you start draping yourself in chains, let's talk about the fundamentals that make a layered look feel chic and deliberate, not just cluttered. This isn't about following rigid rules, but more about developing an eye for what creates harmony and balance. It's a personal art form.
This trend has absolutely exploded, and for good reason. It lets people express their unique style. In fact, the global necklace market was valued at $52.32 billion and is expected to climb to $75.85 billion by 2032, which I think is partly because we all love the creative freedom that layering gives us. A recent market analysis from Fortune Business Insights dives deeper into this growth if you're curious.
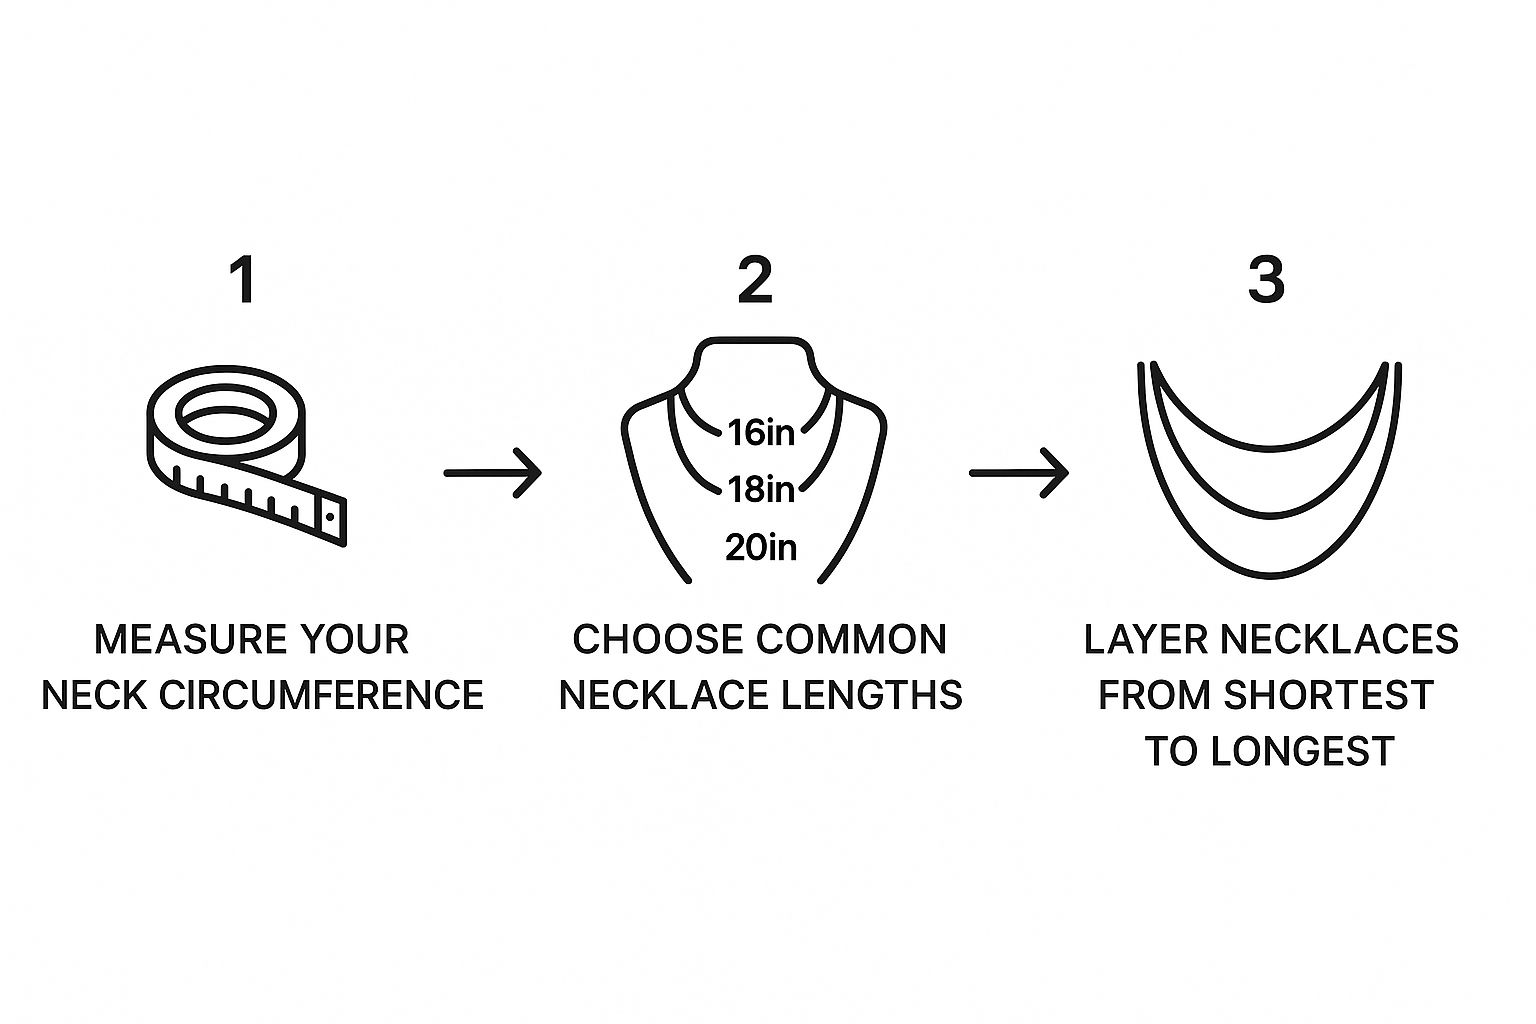
The Rule of Three
If you're just starting out, the "Rule of Three" is a fantastic, almost foolproof, guideline. It’s simple: pick three necklaces to create a beautiful, cascading V-shape.
- Your Choker or Shortest Chain: This is your top layer, sitting high on the neck at around 14-16 inches. It establishes the upper boundary of your stack.
- Your Mid-Length Piece: Next comes a necklace that’s typically 16-18 inches long. This one fills the middle ground and is a great spot for a small charm or a chain with an interesting texture.
- Your Longest Chain or Pendant: Finally, add your longest piece, usually 20 inches or more. This draws the eye downward and really completes that signature layered look.
Establish a Hero Piece
Another approach I love is to build your stack around a "hero piece." This is your showstopper—the one necklace you want everyone to notice. It could be a chunky chain, a vintage locket you adore, or a pendant with a stunning gemstone.
Once you have your hero, everything else is just the supporting cast. The goal is to complement, not compete. So, if your hero is a detailed pendant on an 18-inch chain, you could frame it with a delicate 16-inch chain above and a simple, fine 22-inch chain below. It’s all about making that main piece pop.
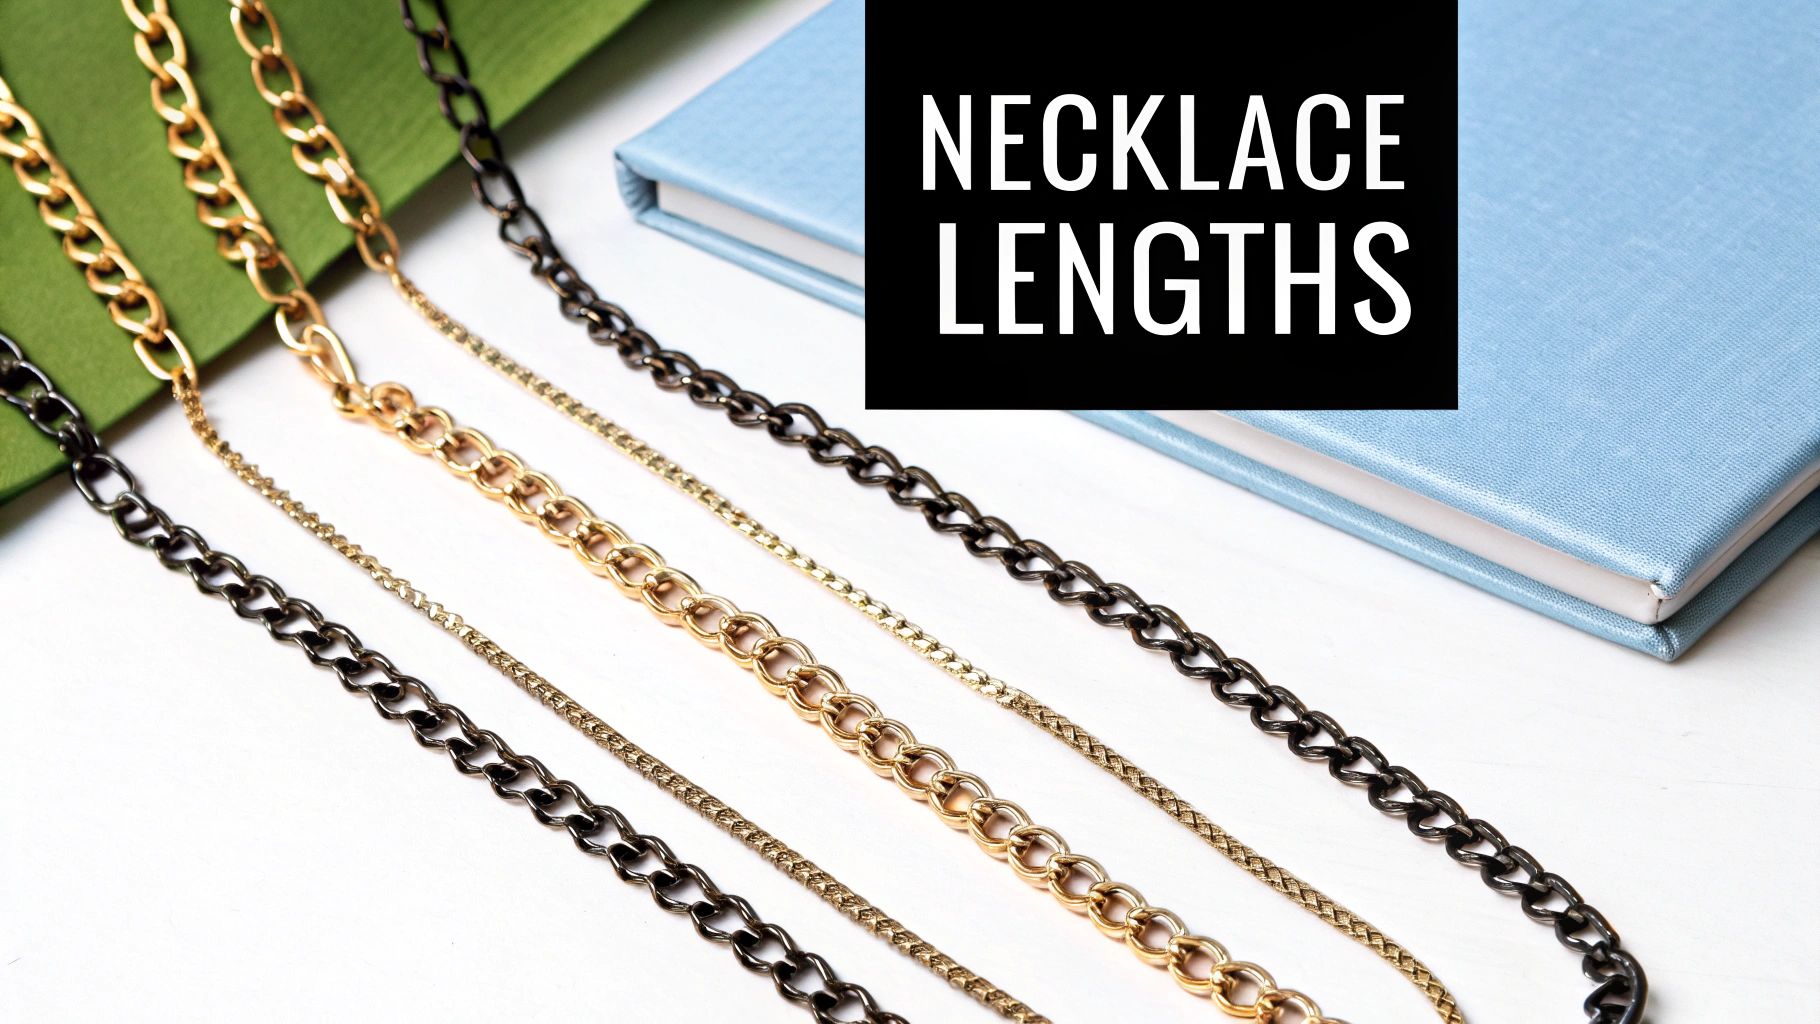
To help you get started, here's a handy little reference table I put together. It breaks down the standard necklace lengths so you can easily visualize how they'll sit and work together.
Essential Necklace Lengths for Layering
| Length (Inches) | Name | Typical Placement | Best For Layering |
|---|---|---|---|
| 14" | Choker | Sits tightly around the neck | Great as the highest point in a stack |
| 16" | Collar | Rests at the base of the throat | A perfect starting point for most layers |
| 18" | Princess | Sits on the collarbone | The most common and versatile length |
| 20"-24" | Matinee | Falls between the collarbone and bust | Adds depth and creates a V-shape |
| 28"-36" | Opera | Hangs on or below the bust | The dramatic final touch for a deep stack |
Think of this table as your cheat sheet for planning your next layered creation. It takes the guesswork out of the process.
This visual guide is also a great way to see how these foundational ideas come together.
Starting with these basic measurements and standard lengths really does create a solid foundation for any necklace stack. Once you've got these techniques down, you'll want to keep your growing collection looking its best. For some of my best tips on that, check out our guide on how to store your jewelry properly.
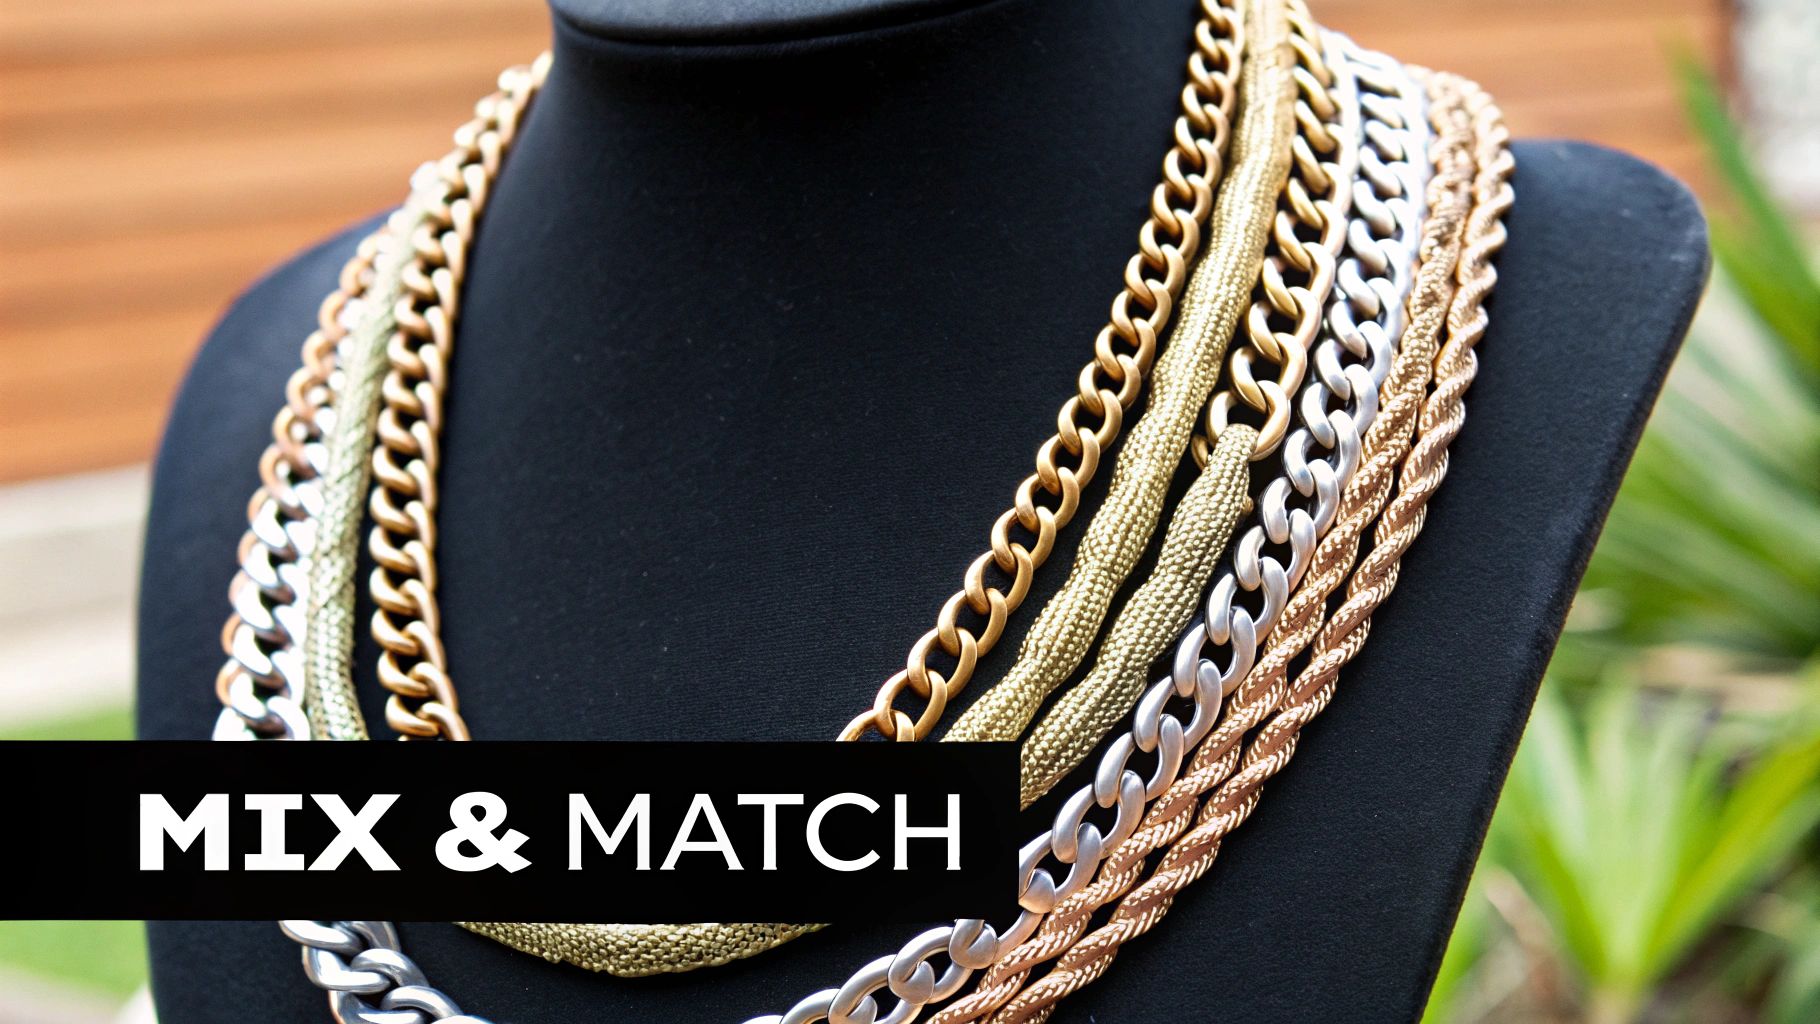
Mixing Metals and Textures with Confidence
Let's be clear: the old rule about sticking to one metal is completely outdated. Honestly, a thoughtful mix of metals often looks far more modern, personal, and effortlessly cool. But there's a trick to it. The secret isn't just tossing a few gold and silver chains together and hoping for the best; it's about creating a look that feels balanced and intentional.
This shift toward personalization is huge in fashion right now. The global jewelry market, valued at roughly $232.94 billion, is seeing massive growth because we all want accessories that truly reflect our individual style. This trend is exactly why creative styling, like mixing metals, has become so popular.
The Art of Mixing Metals
So, how do you get it right? My go-to method, and a fantastic starting point for anyone, is what I call the "2+1 guideline." It's a surprisingly simple way to make sure your mixed-metal stack looks curated rather than chaotic.
The idea is to pick two necklaces in your primary metal—let's say yellow gold—and then add just one piece in a contrasting metal, like sterling silver. This instantly creates a focal point and an accent, making the whole combination feel deliberate. For instance, you could try pairing a delicate 16-inch gold chain and a mid-length gold pendant with a slightly chunkier silver link chain nestled between them.
This simple ratio gives you that cool, eclectic vibe without sacrificing visual harmony. It works just as well with rose gold and silver, or even all three if you're feeling bold.
Key Takeaway: The "2+1" ratio is the easiest trick in the book for a layered look that feels both intentional and stylishly mismatched.
Of course, when you're working with different metals, keeping them looking their best is key. If you're wondering about proper care, our guide on does gold jewelry tarnish has some great tips.
Play with Contrasting Textures
Mixing metals is a great first step, but what really elevates a layered look is playing with texture. This is what adds depth and a rich, tactile quality that makes your stack truly interesting. I always think of it like putting together an outfit—you wouldn't just wear one fabric from head to toe. You mix silk with denim, or leather with soft cashmere.
The exact same principle applies to your jewelry. A great textured stack is all about creating beautiful contrast.
Here are a few combinations I absolutely love and recommend all the time:
- Smooth & Detailed: Start with a sleek, slinky snake chain and layer it with something more intricate, like a beaded or rolo chain. The liquid shine of the smooth chain makes the detailed one pop.
- Delicate & Chunky: This is such a modern, confident look. Combine a super-fine, shimmery chain with a bold paperclip or a substantial curb chain. The contrast is dramatic and chic.
- Metallic & Natural: Don't be afraid to bring in materials beyond metal. A simple gold chain looks incredible layered with a classic pearl strand, a casual leather cord, or a necklace featuring colorful gemstones. This adds a whole new dimension and a real touch of personality.
When you start combining different metals and textures this way, you’re no longer just layering necklaces. You're creating a signature look that's full of detail, uniquely yours, and ready for absolutely any occasion.
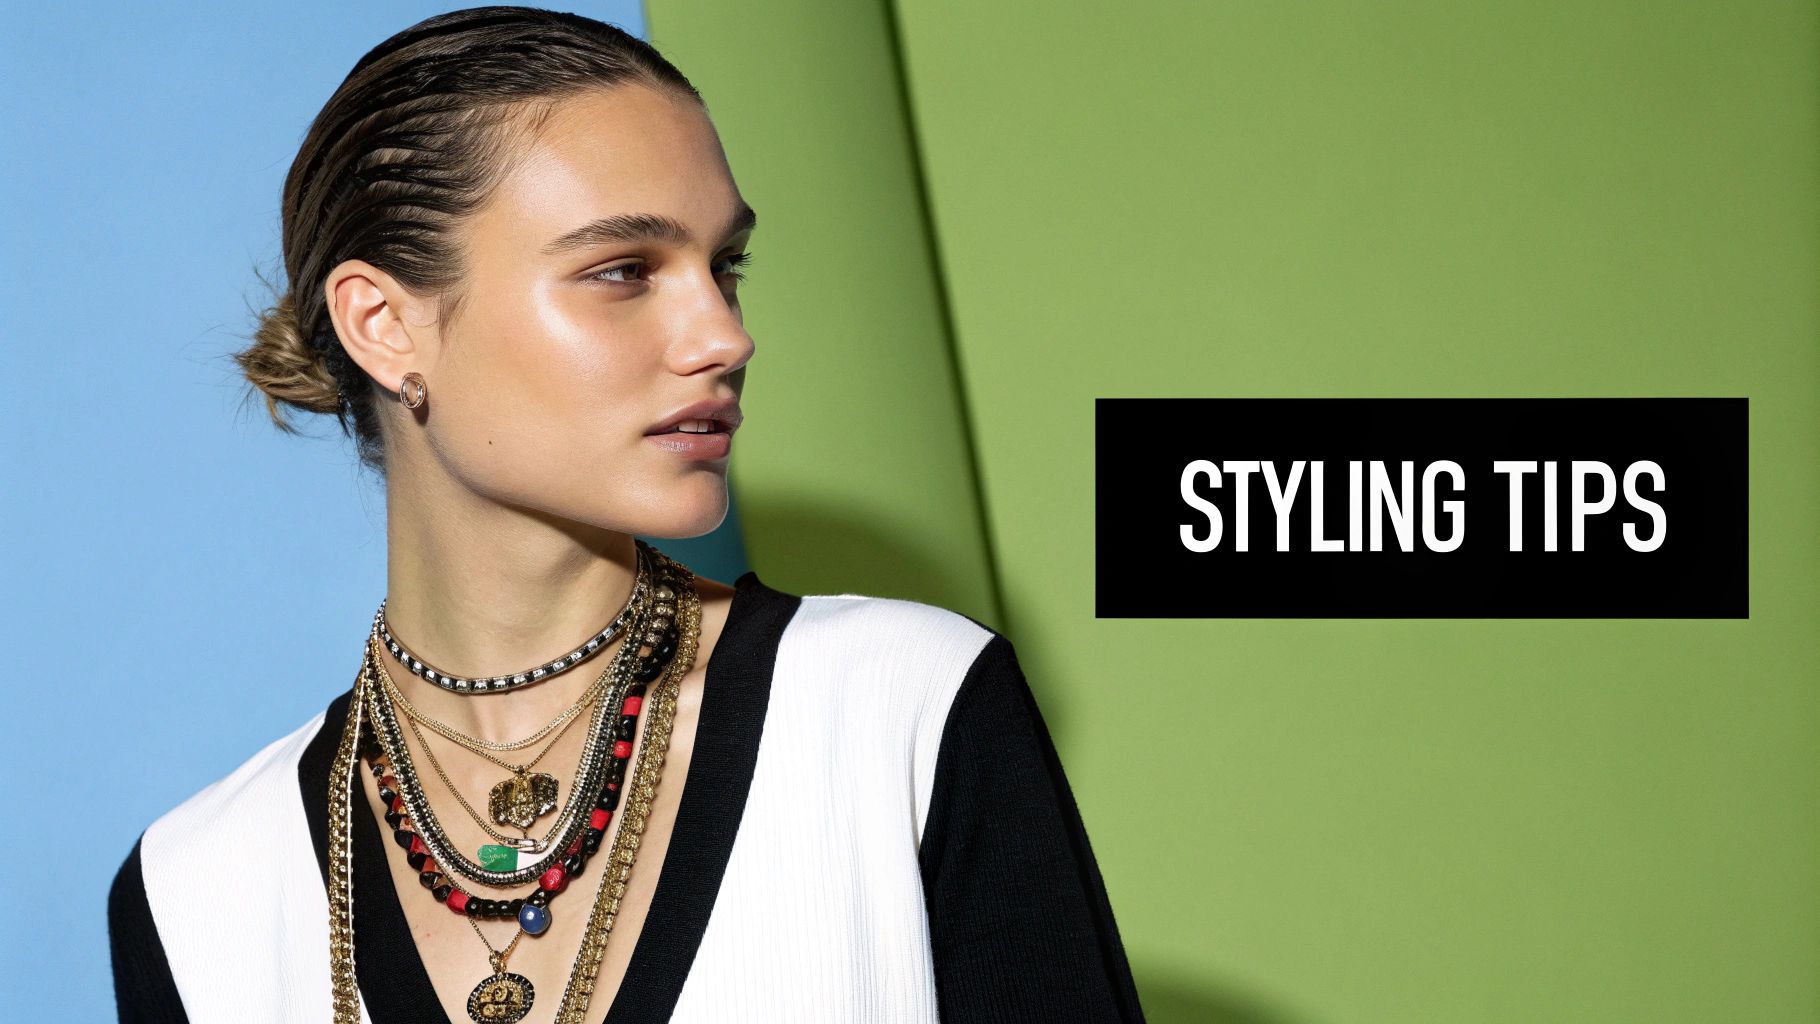
Choosing Pendants That Tell Your Story
While a simple stack of chains is elegant on its own, pendants are where your layered look truly gets its personality. They're the storytellers, turning a beautiful arrangement of necklaces into a statement that’s deeply and uniquely you. This is your chance to wear your passions, memories, and style right around your neck.
Think of it less like following rules and more like curating a tiny, wearable gallery. Each pendant is a little piece of art, and you're the one deciding how they all come together to create a cohesive and captivating exhibition.
Creating Visual Weight and Balance
Once you start adding pendants, you introduce a new concept to the layering game: visual weight. The secret to a look that feels balanced and intentional—not just cluttered—is placing those pendants strategically. My go-to method is to create a downward cascade.
Start with your smallest, most delicate charm on the shortest necklace. This could be a tiny birthstone, a subtle initial, or another dainty symbol. As your chains get longer, the pendants should get progressively larger or more detailed. For instance, a medium-length chain might hold a coin pendant, while your longest chain could feature a more substantial statement piece, like a vintage locket or a striking gemstone.
Pro Tip: This small-to-large approach naturally draws the eye downward, creating a flattering V-shape that elongates your neckline. It's a simple styling trick that ensures your pendants work together instead of fighting for the spotlight.
Mixing Pendant Styles for a Unique Narrative
The most interesting layered looks I've seen are the ones that tell a story by mixing different styles, eras, and themes. Don't shy away from pairing a sleek, modern bar pendant with an ornate locket that’s been in your family for generations. That very contrast is what makes the collection yours.
Here are a few combinations I love to play with:
- Modern Meets Vintage: Combine a clean, geometric charm with a softer, antique-inspired piece.
- Symbolic & Sentimental: Mix a protective talisman with a charm that marks a personal milestone. This is why initial necklaces are the perfect personalized gift—they add that instant layer of meaning.
- Earthy & Ethereal: Pair a natural element, like a raw crystal or seashell charm, with a polished metal piece for a gorgeous textural contrast.
One last practical tip: pay attention to the actual weight of your pendant. It needs to be heavy enough to hang properly and keep the chain from twisting or flipping around. A well-weighted pendant ensures your entire stack looks intentional and put-together all day long. It's a small detail, but it makes a world of difference.
Styling Layered Necklaces for Any Neckline
The perfect necklace stack can take a simple top and make it a whole moment, but only if it works with your neckline, not against it. Think of your neckline as the frame for your jewelry. You’re trying to create a beautiful picture, not a cluttered mess. Getting this balance right is what makes a look feel intentional and polished, rather than accidental.
Learning to style your necklaces based on what you’re wearing is a skill that will completely elevate your wardrobe. It’s all about making sure your favorite pieces get the spotlight they deserve.
The Deep V-Neck and Scoop Neck
These wide-open necklines are a layer-lover's dream—they practically beg for decoration. For a deep V-neck, the trick is to mirror the "V" shape of the shirt itself. You want to create a waterfall effect with chains that get progressively longer, drawing the eye down to where the fabric meets.
For instance, try starting with a delicate 16-inch chain, adding an 18-inch coin pendant, and finishing with a 20-inch lariat-style necklace. It’s a combination that beautifully elongates and complements the cut of the garment. A scoop neck gives you similar freedom but with a softer curve, making it the perfect home for a cluster of mid-length pendants that can nestle together in that open space.
The Classic Crew Neck and Turtleneck
High necklines like a crew neck require a totally different approach. You aren't filling empty skin, you're accessorizing the fabric. A tight stack that sits right above the collar looks incredibly chic and modern. I love pairing a 14-inch choker with a slightly heavier 16-inch chain to create a cool, collared effect.
Turtlenecks, however, are all about length and confidence. Since your neck is completely covered, shorter layers will just get lost. This is where you bring out your long, dramatic chains—we’re talking 24 inches and longer. A single, bold opera-length chain or a few layered long pendants over a turtleneck creates a sleek, sophisticated silhouette.
My Personal Tip: When you're wearing a turtleneck, don't be afraid to go bigger and bolder than you normally would. A substantial pendant or a thicker chain really pops against the solid backdrop of the sweater, making a strong, confident statement.
The Versatile Button-Down Shirt
The classic button-down shirt is a true chameleon. When it’s buttoned all the way up, treat it like a crew neck and layer a tight stack or a longer chain over the top. My absolute favorite look, though, is with one or two buttons undone.
This creates the perfect little "V" for a few delicate necklaces to peek out from. A simple 16-inch chain paired with an 18-inch piece with a tiny charm is just effortlessly cool. It’s that subtle hint of sparkle that feels both personal and put-together, perfect for moving from the office to after-work drinks.
Neckline and Necklace Pairing Guide
To make it even easier to visualize, I've put together a quick cheat sheet for pairing your layered necklaces with the most common necklines you'll find in your closet.
Here's a simple guide to help you find the perfect match every time.
| Neckline Type | Best Layering Strategy | Lengths to Focus On | Pro Tip |
|---|---|---|---|
| V-Neck | Create a "waterfall" effect following the V-shape. | 16", 18", 20"+ | Use a pendant on the longest chain to anchor the look. |
| Crew Neck | Stack tightly above the neckline for a "collar" effect. | 14", 16" | Mix a choker with a slightly chunkier short chain. |
| Scoop Neck | Fill the open space with a rounded cluster of necklaces. | 16", 18" | Multiple mid-length pendants work beautifully here. |
| Turtleneck | Go for long, bold chains worn over the fabric. | 24", 30"+ | A single, statement opera-length chain is very chic. |
| Button-Down | Let delicate layers peek from an open collar. | 16", 18" | Keep it simple with two fine chains for a subtle look. |
Think of these as starting points. Once you get the hang of the basic principles, you can start breaking the rules and experimenting to find the combinations that feel most like you.
Solving Common Necklace Layering Problems
We’ve all been there. You leave the house with a perfectly curated set of layered necklaces, only to find a tangled, jumbled mess a few hours later. It’s one of the most common frustrations with this look, but don't worry—these issues are surprisingly easy to fix.
The biggest culprit is, without a doubt, the dreaded tangle. This usually happens when your chains are too close in length and have similar weights, letting them twist and knot together as you move. The simplest fix? Vary your chain weights. Try pairing a super fine, delicate chain with something that has a bit more presence, like a curb or paperclip style. The heavier chain acts as a natural anchor, keeping the lighter one in its own lane.
Another game-changer is a necklace detangler, sometimes called a layering clasp. It’s a clever little accessory with several rings on one side for each necklace and a single clasp on the other. You attach each chain individually, and it keeps them perfectly spaced at the back of your neck, making tangles practically impossible.
When Your Layers Just Look... Messy
Sometimes the problem isn't tangling, but visual chaos. If your stack feels more "cluttered" than "curated," it’s time to take a step back and edit. A successful layered look needs a clear focal point, not a bunch of pieces all fighting for the spotlight.
Lay your necklaces out and think about the vibe you're going for. Is there one "hero piece" you really want to show off? If so, treat the other necklaces as its supporting cast. They should complement the main piece, not compete with it.
My go-to rule is 'one statement at a time.' Let one piece be the star—whether that's a chunky chain, a bold pendant, or a vibrant beaded necklace. Everything else should be more understated to create a beautiful, balanced look.
Take the trend of layering with diamond necklaces, for example. A brilliant diamond piece makes a stunning focal point. This isn't just a fleeting style; it's part of a huge shift towards personalized luxury. In fact, the diamond necklace market is already valued at $5.9 billion and is expected to keep growing. You can dive deeper into this trend with the diamond necklace market report. When styling a piece this special, you want simpler chains around it to enhance its sparkle, not steal the show.
Keeping Everything Lined Up and Centered
The last common headache? Pendants that won't stop flipping over or an entire stack that slowly creeps to one side. This is almost always an issue of weight and balance.
- For Flipping Pendants: This usually means the pendant is too light for its chain. The best solution is to find a heavier, better-weighted pendant. But if you’re absolutely in love with a lightweight charm, try moving it to a much finer chain that it can actually hold down.
- For Shifting Stacks: If you find your clasps constantly ending up at the front, it's because they're the heaviest part of your setup. An easy fix is to add a pendant with some substance to your longest chain. This creates an anchor at the front, helping to keep the whole stack centered and looking great all day long.
Answering Your Top Layering Questions
Even after you've got the basics down, a few practical questions always seem to pop up when you start experimenting with layering necklaces. What do you do when they all tangle up? Is mixing gold and silver a fashion faux pas? How many is too many?
Let's clear up those lingering uncertainties. Think of this as your go-to reference for troubleshooting the little details, so you can stack your necklaces with total confidence.
How Do I Stop My Necklaces From Tangling?
This is, without a doubt, the number one frustration. But don't worry, it's completely fixable! The whole trick is to create separation between your pieces.
First, always make sure your necklaces have at least a one-inch difference in length. That small gap is your best friend and the first line of defense against them getting intertwined.
Next, play with different chain weights and textures. A chunkier chain just doesn't tangle as easily with a super delicate one. The contrast in weight and feel helps each necklace hang independently and stay in its own lane.
If you have a favorite stack you wear all the time and want a truly foolproof solution, look into a multi-strand necklace clasp. These brilliant little gadgets have individual rings for each necklace, keeping them perfectly spaced out at the back of your neck. No more mid-day detangling sessions.
Is It Okay to Mix Gold and Silver Necklaces?
Yes, absolutely! The days of being strictly a "gold person" or a "silver person" are long gone. Mixing metals is a fantastic way to show off your personal style and add a modern edge to your look.
The key is making it look intentional, not accidental. An easy way to do this is the "2+1" method. Just pick two necklaces in your main metal (say, gold) and then add a third piece in your accent metal (like silver). This creates a balanced, curated vibe. You can also find pieces that already have mixed-metal elements to help bridge the gap and tie everything together.
Expert Insight: Think of one metal as your base color and the other as your accent. This simple mental shift makes choosing pieces so much easier and ensures your final stack looks harmonious and deliberately stylish.
How Many Necklaces Is Too Many?
There isn't a hard-and-fast rule, but for most people, the sweet spot for everyday style is three to four necklaces. This feels full enough to make a statement but is still manageable and lets each individual piece shine without looking cluttered.
Now, if you're feeling bold and want to create a more dramatic, maximalist look, you can definitely push it to five or even more. When you're stacking that many, it becomes even more important to have major variations in length, texture, and scale. You need that visual space to keep the look clean and avoid it turning into a tangled mess. At the end of the day, it's all about what feels right for you and your outfit.
Ready to build your own signature stack? The curated collections at Molenia Jewelry offer the perfect pieces to start your layering journey. From delicate chains to meaningful pendants, find your next favorite accessory at https://www.moleniajewelry.com.